In this blog post, we will see how to change the Windows 10 default cursor scheme to Apple mac OS cursor sprites set
With this, we can easily change the mouse pointer for Windows to give the look and feel of Mac OS mouse cursor set.
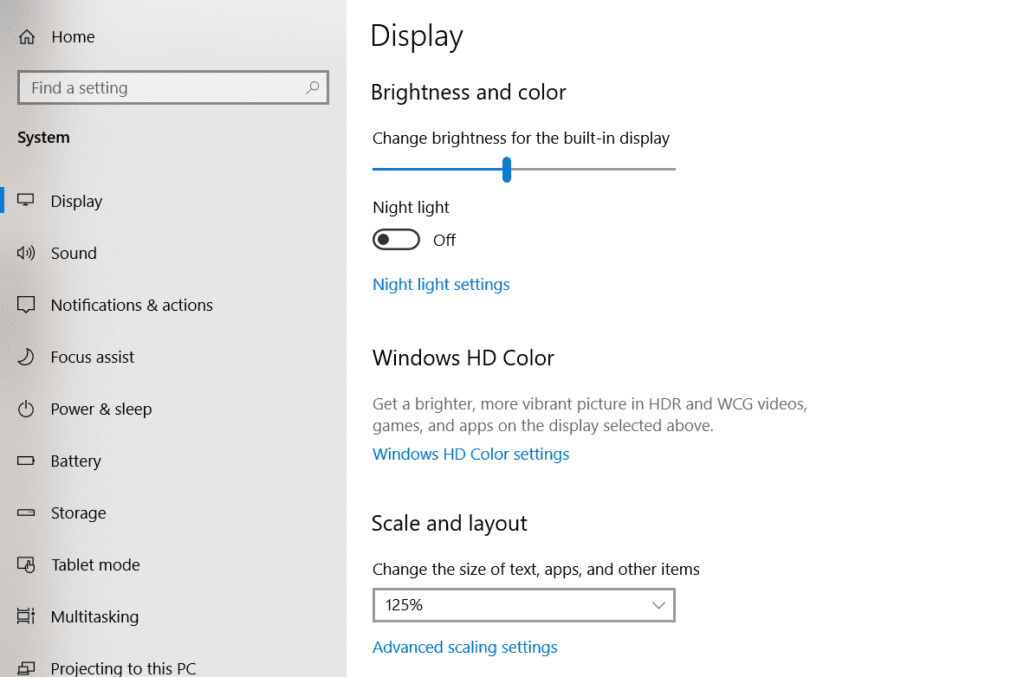
First and before we set to change the default cursor scheme, it’s a best practice to first check and see what DPI (Dots Per Inch) setting does our PC have.
This helps in getting the best-suited mac OS cursor set for our computer because if the DPI is set to 100% then you might need the El Capitan cursors and if the DPI is set to > 100% then you will need the macOS Sierra cursors (just like how I did – you can see a walkthrough demo in the video provided below).
How to check your Windows computer’s DPI setting:
Right click on the Start button and click on Settings.

Search for Display settings in the search bar.

Here, you’ll see the Scale and layout section with the scaling percentage.

Now, depending on the scaling percentage your computer has, choose one of the two links given below.
Download Mac cursor for Windows from these links:
El Capitan cursors for Windows (100% DPI): https://www.deviantart.com/in-dolly/art/Updated-ElCapitan-cursors-593804414
macOS Sierra cursors for Windows (Higher DPI): https://www.deviantart.com/in-dolly/art/macOS-Sierra-Retina-cursors-650823654
That’s how you can change the Windows’ default cursor scheme with the fancy macOS cursor scheme.
Hope this helped you, if so please let me know in the comments below.
Read more:
How to Download an Embedded Video from a Website
7 Insights for Book Authors to Sell More Books
This is how to remove claps in a Medium article (if already clapped)
25 Awesome Tools For Authors and Self-publishers


